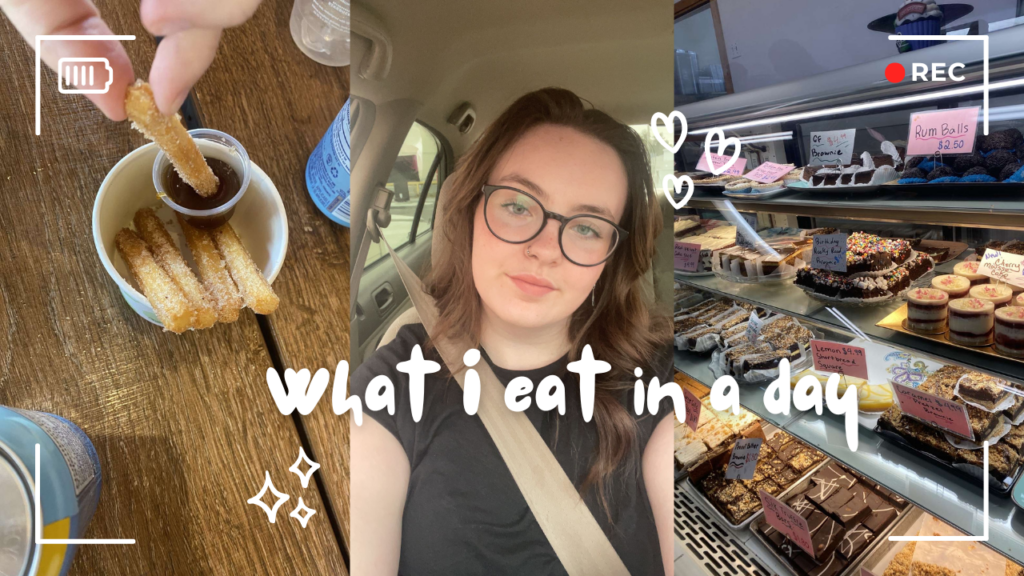
Hi! This is officially my final blog post for EDCI136. I am very excited to have reached the end of the course, and I honestly feel like I have learned a lot. I am very proud of myself for completing the course and I look forward to transferring these skills outside of class.
Below is my final vlog. Trigger warning, I do talk about my experience with eating disorders, but there is a timestamp within the video.
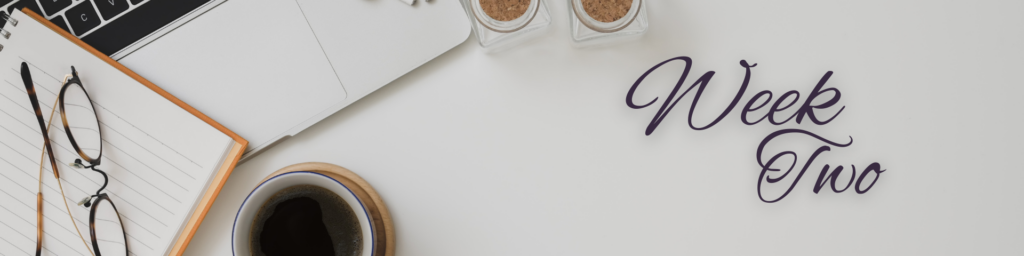
I am currently in the process of creating my second and final vlog.
The vlog will be another lifestyle vlog, with the topic of “What I Eat In A Day (living in residence)”. In this video, I will go through my daily life and talk about what I eat from the Cove at UVic. I will also lightly talk about nutrition, working out, and my struggle with eating disorders. While these topics may be triggering for some, they are apart of my everyday life and I am excited to share my story. There will be a trigger warning placed at the beginning of the video.
For this vlog, I am going to attempt to use Vimeo to edit, as I have never used it before. I will, however, continue to use GarageBand to edit the music I use.
Below is my thumbnail for the video (made on Canva):
Below is the video tutorial I am using to guide me through Vimeo, as I have never explored this platform before. I am very excited to give it a try!
Vimeo Tutorial For Beginners (2023) | How To Use Vimeo Online Video Editor by HelperMan
This past week, Valerie’s post consisted of a link to a video interview with a cybersecurity expert, and that talk stood out to me. They talked about cybersecurity, specifically about cyber attacks, cybercrime, hacking, and more.
As a student with a strong digital presence, the threat of cybersecurity holds a high place in my thoughts. I have a near constant worry about what may happen. Whether my information will be stolen and sold, if my bank accounts will be hacked, if i’ll lose all the work I’ve done, and whether my friends and families personal information will be compromised.I have accounts on almost all of the major social media platforms. Facebook, Instagram, X, Threads, TikTok, Youtube, you name it! I also use Google as my main browser, which houses all my emails (personal and work related), my photos, my calendar, events and their locations, and so much more.
In the talk, the speaker mentioned how easy it has become for everyday people to become cybercriminal. With the easily accessible hacking programs/kits on the Dark Web and the use of AI, cyber threats are at an all time high. they also mentioned how high the cost are to regain access to your accounts. These attackers make a profit of the information they are selling, large in part to the fact that they sell it back to the rightful owners. A good example of this is the United Health company paid over $22 million in ransom, and the attack response cost the company over $2.3 billion.
Throughout media, there are loads of examples that show just how dangerous these breaches can be. For example, lots of famous streamers are consistently faced with SWAT-ings. Rather than put a real video in this post, I have opted to add a quick scene from the movie “Unfriended: Dark Web” where a SWAT-ing is depicted. (Trigger warning: death)
In this scene, a characters laptop is hacked and a series of edited clips and AI generated noises are compiled together to get the character killed. This is a prime example of how dangerous cyber attacks can truly be.
That is one example of how important it is to take proper cybersecurity measures. Below is a video that explains what cybersecurity is and how we can implement some practices to secure our data.
This week, I have chosen to dive into more of the creative side of digital literacy. This post relates directly to my project, where I am exploring video editing through lifestyle type vlog. Below, I have added some videos about editing, the tips I generated through ChatGPT, and some personal insight.
New to Video Editing? Watch This FIRST! (Master Editing in 60 Days) by Joseph | Video Editing
Vlog Editing Tips (generated by ChatGPT through specific prompts).
1. Import Your Footage
Before you dive into editing, make sure to organize your clips:
Label everything: Create folders for different days or scenes (e.g., “Morning Routine,” “Workout,” “Mental Health Tips”) to make it easy to find what you need.
Backup your footage: Always make sure your footage is safely stored in two places (your hard drive and an external backup), just in case.
2. Choose Your Editing Software
Depending on what you’re comfortable with, here are some options:
Beginner-Friendly: iMovie (Mac) or Filmora (Windows/Mac) are simple and easy to learn.
Intermediate/Advanced: Adobe Premiere Pro or Final Cut Pro offer a lot more features if you’re looking to get more creative.
Free Option: DaVinci Resolve is great for both color grading and editing, and it’s free!
3. Basic Editing Workflow
Here’s a basic flow of editing a typical vlog:
Step 1: Rough Cut (Cutting Out the Extra Stuff)
Trim your clips to remove anything that’s unnecessary, awkward, or repetitive. This will help your vlog feel tighter and more engaging.
For a “Day in the Life” vlog, you might want to fast-forward through parts like getting ready or eating breakfast (unless it’s a key moment or you want to add something funny or relatable).
For a “Mental Health Journey” vlog, make sure the important emotional beats or discussions come through clearly.
Step 2: Organize Your Timeline
Sequencing: Place your clips in order according to your story. For a “Get Ready With Me” video, for instance, you’ll start with your intro, then show the process of getting ready, followed by your thoughts for the day.
Add transitions where needed. Keep them simple; you don’t want too many flashy transitions, as they can distract from the content. A simple fade or cross dissolve can work wonders between scenes.
Step 3: Add Music (But Keep It Subtle)
Background Music: Choose calming, uplifting music that fits the vibe of your self-betterment content. Look for royalty-free music or stock music libraries like Epidemic Sound, Artlist, or YouTube’s free music library.
Volume: Ensure the music is low enough not to overpower your voice overs or speaking moments. Music should complement, not compete with, your words.
Step 4: Color Grading (To Set the Mood)
If you’re using software like Premiere Pro or Final Cut Pro, you can adjust the color grading to give your video a more cohesive or professional look.
For a calm, wellness vibe, you can tweak the brightness and contrast to make everything look fresh, but don’t overdo it with filters. A slight warmth can make the footage feel inviting and relaxed.
Step 5: Add Text/Graphics
Titles/Lower Thirds: Introduce yourself or the video topic with a stylish title card. Something simple, like “Morning Routine” or “Mental Health Check-In,” can work well. You can also use lower thirds to introduce specific topics or even add small pieces of advice in text form.
Motivational Quotes: For mental health vlogs, adding uplifting quotes or affirmations on the screen is a great way to inspire your audience. Keep them minimal and legible—don’t clutter the frame.
Call to Action: At the end, include a gentle reminder to like, comment, and subscribe, or encourage your audience to share their thoughts. You can make this fun and engaging without it feeling too sales-y.
Step 6: Audio Adjustments
Voiceover: If you’re doing voice overs (for your “Day in the Life” or “Mental Health Journey” moments), make sure to clean up the audio. You can remove background noise and adjust levels so it’s clear.
Use an audio compressor to even out the volume levels between your talking and the background music.
Step 7: Fine-Tuning & Transitions
Go back through and refine your edits. Tighten up anything that feels too long or unnecessary, and make sure the pacing feels natural. For example, if you’re doing a “Mental Health Check-In,” keep those moments calm and reflective, with slower pacing. For a “Day in the Life,” a bit of speed or upbeat pacing can keep the energy high.
Add transitions between major sections, but don’t overuse them. You don’t need flashy effects—simple fades or cuts can often be the most effective.
4. Review & Export
Final Review: Watch your vlog all the way through before exporting. Are there any moments where the pacing feels off? Does your intro hook the viewer? Is the message clear?
Export Settings: Once you’re happy, export the video at a resolution of 1080p (Full HD) or higher. If you’re planning to upload to YouTube, make sure the file is in MP4 format with an H.264 codec.
5. Upload and Engage
Thumbnails: Create a clickable, vibrant thumbnail that represents your video. Bright colors, your face, and simple text often work well.
SEO: Add relevant tags, titles, and descriptions to optimize your video for search engines, especially for self-betterment or mental health-related content.
Editing Tips Specifically for Self-Betterment Vlogs
Keep It Real: A big part of self-betterment vlogs is showing the raw, unfiltered moments. If you’re talking about a rough day or a personal challenge, don’t be afraid to leave in the imperfections. These moments can be incredibly relatable and powerful.
Incorporate B-Roll: Footage of nature, journaling, or any actions related to your self-care routine can enhance the storytelling and keep things visually dynamic.
Use Text to Emphasize: When discussing important points about mental health, positive habits, or affirmations, consider emphasizing them with on-screen text for added impact.
How I Would Learn Video Editing (If I Had to Start Over in 2025) by Gavin Herman
This video was a really helpful tutorial, when I began video editing. I highly recommend watching this if you want to start editing!
My personal advice for video editing, is to choose a topic that interests you. If you pick something that you don’t want to create, you will find yourself stuck and unable to properly complete your project. Your audience will also be able to tell that you are not fully invested in your project.
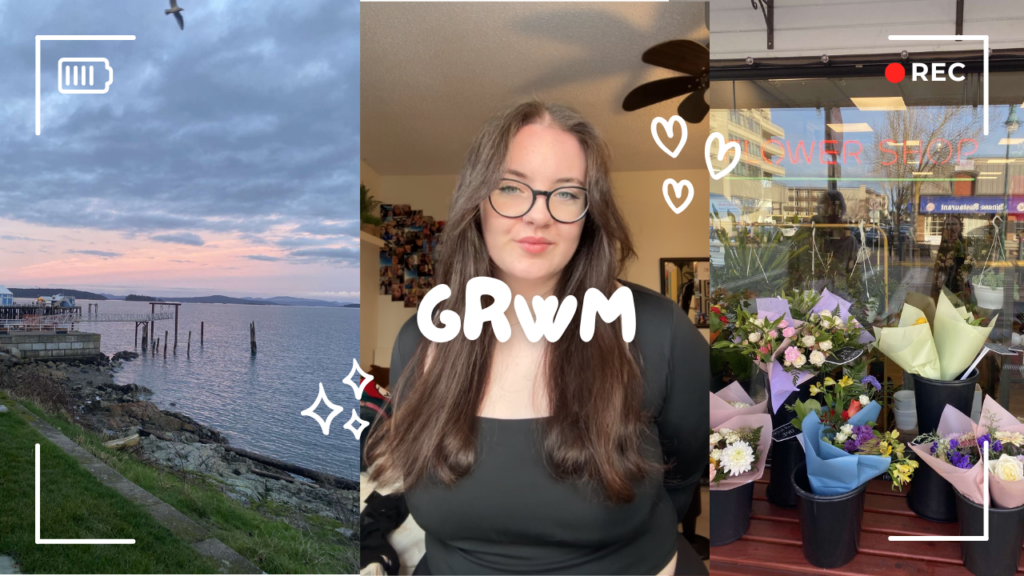
Hi! Here is my first ever vlog! It is posted on Youtube as Unlinsted, so only people with the link (through this blog page) will be able to access it.
This video is a ‘Get Ready With Me’ (GRWM) style vlog, where I get ready for a day of classes as a university student. This is not a typical morning routine for me, but I figured what better time then the present to film my first video.
To make my thumbnail, I used a Canva template, to which I added my own pictures.
To edit the music used, I picked one of my favourite songs (Femininomenon by Chappel Roan) and put it into GarageBand. This took me about 30 minutes to edit, just because of the language in the song.
To edit the video, I used iMovie. Next time, though, I think I will try a different free editor, to broaden my skill set.
Overall, the process took me about 2.5 hours, and was really fun! I really enjoy video editing and this was a fun project for me to do.
Keep an eye out for a blog post which will detail all of the steps, a breakdown, and tips on video editing.
The video is embedded below, I hope you enjoy!
Stay tuned for next week’s video, which will be a ‘What I Eat In A Day (living in residence’ vlog!
Although, we did not have a class directly related to this content, I figured as an educator of young people this topic is extremely important. The topic in question is internet safety for youth.
I was given access to the internet at the age of 10, and have seen some pretty harmful, inappropriate, and disturbing content since then. This is part of the reason why I think internet safety education is important.
A few resources have been implemented across platforms to ensure safety, however, are they enough? Let’s take a look into YouTube kids.
“YouTube Kids is designed to be a family-friendly environment aimed at making exploration fun and simple. Kids can discover new and exciting interests while parents and caregivers have access to tools that help guide the YouTube Kids experience.” – YouTube Kids (https://www.youtube.com/kids/)
Now, the concept of YouTube Kids is wonderful! A place where children can explore videos from their favourite creators. A place that parents can let their kids explore without fear, right? Wrong. Anyone can post anything to YouTube Kids. As I was uploading my vlog yesterday, I noticed a feature where you can click “Made For Kids” and it will upload your video to YouTube Kids for anyone under the age of thirteen.
This led to a deep dive. I quickly went to YouTube kids and discovered some pretty unsettling content. Parents posting their mostly nude kids in bathing suit, people making dolls exhibit sexual behaviours, parents punishing kids, and more. This makes me wonder if there are any guidelines to videos, any guidelines that will have videos be removed.
YouTube says that they have a system in place to flag and remove videos, however, that does not align with lot’s of the content I’ve seen.
“YouTube Kids has faced criticism from advocacy groups, particularly the Fairplay Organization, for concerns surrounding the app’s use of commercial advertising, as well as algorithmic suggestions of videos that may be inappropriate for the app’s target audience, as the app has been associated with a controversy surrounding disturbing or violent videos depicting characters from children’s media franchises. Criticism over the videos led YouTube to announce that it would take more stringent actions to review and filter such videos when reported by the community, and prevent them from being accessible from within the YouTube Kids app.” – YouTube Kids Wikipedia (https://en.wikipedia.org/wiki/YouTube_Kids)
The video below also explains the issues with YouTube Kids really well.
The Hidden Dangers of YouTube Kids Content by Visual Venture
As of right now (February 25), I have not begun filming for my video editing series. After being home for Reading Week, and coming back to Victoria with a stomach bug, it has not been easy to find the time or energy to begin this project. However! My plan is to begin filming this week.
All that being said, I have begun editing music for my videos, as well as thumbnails (thumbnail can be seen below). I will have another progress post later this week!
AI is a powerful tool, but also a scary one. We are seeing AI used more frequently, especially now that it is so easily accessible. There are lot’s of benefits to AI, but there are also lot’s of downsides.
Benefits of AI Usage
Personalized learning support
New ideas
Accessibility (translation, speech-to-text, etc.)
Creativity and Innovation
Downsides of AI Usage
Plagiarism
Misinformation
Bias reinforcement
Privacy and data insecurity
As a student who uses ChatGPT, I believe that AI is a wonderful tool that can really help students learn and grow, but when used incorrectly can inhibit learning.
This video dives deeper into how AI has, can, and will effect the human race over the coming years.
As of late, all major platforms such as Meta, Google and YouTube all use AI in their technology, some even creating their own AI platforms (Meta AI, Gemini).
Is there something people can do to change the threat that AI poses? Is there a way humans can work with AI, instead of AI pushing people out of jobs? We have yet to see.
This past week, I took a step back from school and focus on myself. In that time I read two books, spent time with friends and family, and got to catch on some much needed RNR.
That being said, I did take the time to read Val’s weekly post on copyright laws and fair use.
Below are Canadian copyright laws explained briefly: (this section can also be viewed in the AI Overview, when “Copyright Laws” is searched on Google.)
Copyright duration: In Canada, copyright lasts for the life of the author plus 70 years.
Public domain: When the copyright term ends, the work enters the public domain and can be accessed and reproduced by anyone.
Copyright infringement: Using copyrighted content without the owner’s permission is copyright infringement.
Copyright exceptions: Some exceptions allow research libraries to share parts of materials without infringing copyright laws.
Moral rights: These rights protect the author’s connection with the work and the integrity of the work.
Copyright assignment: An agreement to transfer the copyright to another person or entity.
Video by the U.S. Copyright Office, explaining copyright.
Copyright is such an important thing, that allows for the rightful authors of media to profit from their original creation. Copyright stops people from profiting off of others material, and using it with malicious intent.
Video by Lawline, explaining the difference between fair use and fair dealing.
These are topics that need to be talked about more frequently. They deal with safety, laws, and more. As a student, who is consistently on the internet, knowing about copyright laws is an extremely important thing. As we are constantly consuming and creating content, having a basic awareness of copyright, fair use, and fair dealing, is the most important aspect of creating content.